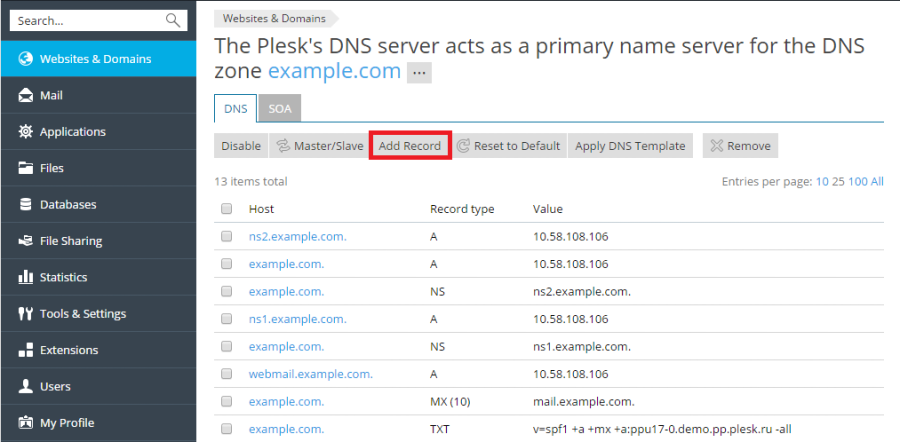
Plesk DNS records

Add a custom DNS record in Plesk

Add an A, CNAME, MX, TXT or other record to a domain hosted on a UKC Plesk server. First confirm that the domain uses that server's nameservers, then add only the record supplied by your service provider.

Find active DNSA record saved in the wrong control panel has no public effect.

Add one recordUse the exact host, type and value provided for the service.

Verify publiclyCheck the exact hostname and record type after saving.

Before you begin

Make sure Plesk controls public DNS

Open the domain in the UKC Client Area and review its nameservers. Plesk DNS is normally the correct place when the domain uses the nameservers assigned to its UKC hosting server, such as a ukc01.uk through ukc13.uk pair.

For UKC Parking nameservers, use the Client Area DNS Manager. For external nameservers, make the change with that DNS provider.

Website hosting and DNS authority are separate.

A website can be hosted in Plesk while its DNS is managed elsewhere.

Choose the record

Match the provider's instructions

  • A or AAAA: Connect a hostname to an IPv4 or IPv6 address.
  • CNAME: Make a hostname an alias of another hostname.
  • MX: Route incoming email using a target and priority.
  • TXT: Publish verification, SPF, DKIM or DMARC text.

Keep the provider's instructions open. Do not add https://, a slash or a web page path unless the instructions explicitly require text containing it.

Plesk steps

Add the custom record

  1. Log in to the correct Plesk server. Use “Log in to Plesk” beside the relevant hosting service in your Client Area.
  2. Open DNS Settings. Go to Websites & Domains, select the domain, then choose DNS Settings.
  3. Select Add Record. Choose the record type requested by the service provider.
  4. Enter the host and value. Copy the hostname, destination/value, priority and TTL carefully. Plesk may append the domain automatically.
  5. Save and apply. Complete any separate Update or Apply confirmation shown above the zone.

Protect existing services

Avoid replacing records that still matter

  • Take a screenshot or copy the existing zone before editing it.
  • Do not remove MX or mail-related TXT records when connecting only a website.
  • Publish one SPF policy at the root; combine authorised senders instead of creating a second SPF record.
  • Do not place a CNAME at a hostname that already has another record.
  • Check whether the provider expects @, a subdomain such as www, or the full hostname.

Verification

Check the public result

Query the exact hostname and record type using a public DNS checker, then complete the provider's verification or test the service itself. Existing resolvers may return the previous answer until its TTL expires.

If the new value never appears, recheck the domain's authoritative nameservers before repeatedly changing the record.

Need help?

Send the exact record requirement

Include the domain, current nameservers, record type, host, required value, priority and TTL, the provider instructions and the public result you receive. Explain which website or email service must remain working.

Unsure where to add it?Open a ticket before changing nameservers or deleting existing records.

Open a support ticket

Was this answer helpful?

« Back